Hooray for Craftsy Unlimited!

Most crafters I know like to have some type of entertainment going while they’re working, whether it’s an audio book, some music or a binge-worthy show. I’m a binge-show kind of gal, so I was ecstatic when Craftsy introduced Craftsy Unlimited. Basically, Craftsy took its fabulous online classes and made ALL OF THEM available for one low price! Whether you’re into crochet, knitting, quilting, apparel sewing, cooking or baking, Craftsy Unlimited has you covered. And if you’re like me, and you just can’t say no to any craft, then you can hop around the different categories to your heart’s content. Since buying my subscription, I’ve learned how to sew a bralette (oh la la), do free-motion quilting and coat a cake with a chocolate mirror glaze that’s pretty enough for a restaurant (gelatin is the key, who knew?).

So I was pretty geeked up when I got an email last week telling me that Craftsy is offering The Good Life Quilt Along class taught by Angela Walters as an exclusive for Craftsy Unlimited members!! And, to top it off, the company offered me a 50% discount on the kit of my choice, as well as free expedited shipping! This company knows how to take care of its members, that’s for sure. I hit that purchase button about as fast as I could, I tell you. When my kit arrived yesterday, I made this short video to show you the contents and just go over how well Craftsy packages all its kits. I’ve ordered a few so far, and I’ve always been impressed with the quality, packaging and speed of delivery. Check out the video below. Also, I forgot to mention in the video that the kits also come with a full-color printed pattern so I don’t even have to use my own ink.

You can still order your kit today and receive it in time to start the QAL on June 15. But even if you order a little late, you’re still going to enjoy this beautiful pattern, which has kits in four color schemes and multiple sizes. I ordered the Cute as a Blossom kit in the throw size. I’ve recently completed two queen-size quilt tops, and I really wanted to try something a little smaller and quicker to finish! Here is a photo of what the finished quilt will look like:

Craftsy Unlimited offers new members a 7-day free trial to poke around and sample the content, so give it a whirl. You’ll never again complain about having nothing to watch!

Note: This post contains affiliate links which earn me a small commission upon purchase, at no cost to you.

Blocking Granny Squares

Can I just say that I LOVE crocheting granny squares? There’s just something sooo satisfying about the way those colors contrast, and the squares work up so quickly that it’s basically instant gratification. In fact, if I only have a few spare minutes available, granny squares are often my go-to craft because I know I can knock out at least a couple of rounds before I have to be on to the next task.

Once you have a nice stack of granny squares ready to join into an afghan or other finished project, you must answer the dreaded question all yarn lovers face–to block or not to block? When it comes to grannies, I’m a big fan of blocking because it straightens out those curled edges and makes the squares more manageable during the joining phase.

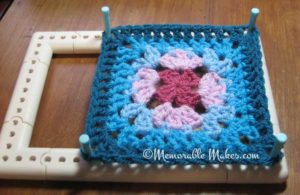
Wet blocking usually involves pinning an item to a foam piece (or a folded towel) and then spraying with water and letting the item dry. I always found the task a bit time consuming for all those little grannies, and then I saw a crochet magazine that included a free giveaway–a blocking board for granny squares. And that’s when I had the idea for this little gadget.

This is a Martha Stewart loom set that can be configured in a variety of shapes, and I use it for loom knitting. I grabbed a few pieces of the loom pieces and added pegs to create a square that’s just the right size to block my grannies. I just slip on one granny, spray with water, then add another granny and repeat. I can fit up to three grannies on the blocker.

With this system, it takes me only about 60 seconds to set some grannies to block, and then I just take them off the blocker a few hours later or the next day. This will make the joining process much easier, and I love it when my craft supplies can pull double duty! By the way, if you’re wondering, this pattern is the Harmony Blanket from Attic 24. I’ve made 10 out of 14 sets so far, and I can’t wait to see how this lovely comes together.

Paper Fan Dress

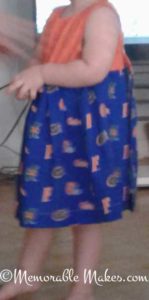
I suppose that as one of the first projects I want to show you, it’s only fitting that I should present a couple of dresses that I have made for one of my favorite Memorable Makes recipients, my great-niece, the fabulous Miss E. She’s 3.5 now, and I made both of these dresses for her when she was 2, shortly before her 3rd birthday. I made them both a little big, and they still fit her, so I’m glad I did. I used this great free pattern for the Paper Fan Dress from the incredibly talented Anna Marie Horner.

The first photo is the front of the dress, and the second is the back. The dress wraps around the back and closes with two large buttons on the bodice. It’s goes on so easily, and I think it’s perfect for an active little girl. I also like that the dress is loose enough that Miss E. can wear a long-sleeve shirt and tights under it to get a little more wear out of it in the colder months.

I apologize for not have a better photo of the second dress, which I made in Gator fabric because we are all big fans and she needs to have something special to wear when we watch the games–go Gator Nation! My phone camera doesn’t take the best indoor pictures, and like I said, Miss E. is always on the move!

Depending on which size dress you’re making (it runs from size 2 to 7/8), you need just 1 to 1.5 yards of fabric for the skirt, so this is a great pattern to make use of those novelty fabrics you just had to have!