In Colorful Harmony

Today, I’m posting an update on my progress crocheting the lovely Harmony Blanket, designed by the talented Lucy at Attic 24. This blanket is a riot of glorious color, all carefully coordinated by Lucy, whose talent is unmistakable. I like to think that I can combine some pretty color patterns from time to time, but I find her choices are just so darn interesting. Many of them are combos I wouldn’t think to put together, but they totally work. Here’s one instance:
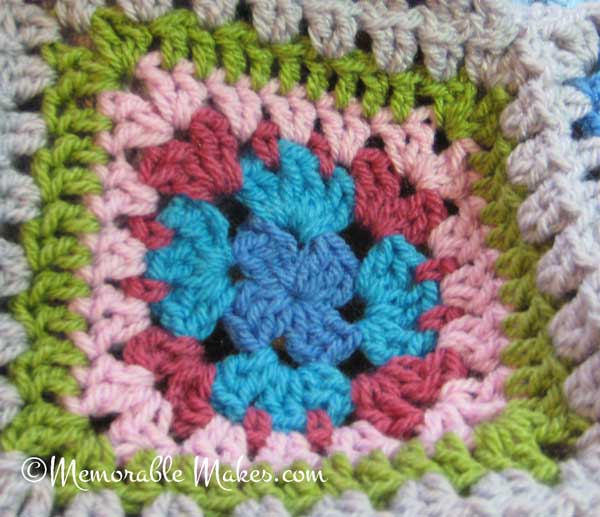
Harmony blanket granny square 1

Isn’t that just the prettiest little collection of contrasting shades? The lime green perfectly sets off the pinks and blues. Here is a pic of some of the granny squares joined together, using the “join as you go” method, which is fabulous. Even the joining color is a fab choice. It’s called Parma Violet, and while it’s kind of gray, it has just the tiniest hint of violet to warm it up. My only quandry is that now that I’m over halfway through the blanket, I’ve realized I have only enough Parma Violet for 8 strips, rather than the 9 that’s called for, so I guess my blanket will be just a little bit more narrow. Oh well, lesson learned–when ordering yarn for joining or a border, grab an extra skein because your tension will affect how much you use. This is Stylecraft Special DK yarn and it came from the UK, so I probably won’t bother to obtain another skein.
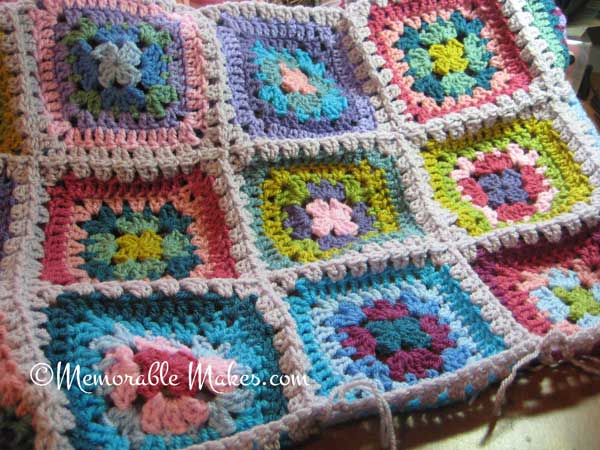
I just want to say how much fun I’ve had with this project, especially because it helped me stick with crochet during the long, ridiculously hot Florida summer. I typically abandon crochet during the summer because yarn seems to make the air feel even hotter, but these granny squares were so small and they worked up so quickly that I didn’t mind cranking out a couple every few days. BTW, if you missed it, I wrote a blog post about blocking these squares, and now that I’m joining them, I’m finding that blocking has made the process much easier–no curled edges. Hurrah!

Crafting Through the Good and the Bad

I’ve put off writing this post for a while. In fact, I had it on my calendar to write this a month ago, but had trouble facing it. Today, even though I’m going to show you a lovely project, I’m going to write about a tough subject for some of us crafters–our memories are tied up in our makes (which is why I chose this blog’s name), but not all of those memories are good ones.

The project is a spritely little poncho I started making for the fabulous Miss E a year ago. I love the rainbow colors and I think she will too. This is a photo of the first half.

So many memories are tied up in this little wrap, and some of them aren’t great. I started it while my family was staying two nights in an evacuation shelter because Hurricane Irma was bearing down on our part of the world. We live in a mandatory evacuation zone and my husband had to help run a shelter, so myself and our son joined him there. I knew I would need to do something with my hands or go crazy, so I grabbed this yarn and a pattern as we left the house that I wasn’t sure would be standing when we returned. Seriously. Right before we left, I took photos of every room to document our possessions for the insurance company. For nearly 48 hours, I watched the dire predictions and wondered how we would deal with the devastation that seemed inevitable. And yes, I stitched the hours away because that is how I mitigate stress. I finished almost half of the little poncho during those two days. This is a photo of the little pallet we made on the floor of the shelter, and you can see the start of the poncho on top of the quilt.

And then, in the midst of all that waiting and watching, something wonderful happened, for us at least. The storm weakened just enough and turned just enough that our area, while enduring some damage, came out pretty well. When we left the shelter and returned home, everything was just as we left. We even had electricity. As I walked into the final room to check for damage, I let out a little yelp. My son came running, terrified something was wrong. No, I said, these are tears of joy. Nonetheless, while I was happy for us, I was sad for those who experienced great devastation. When you live in the path of hurricanes, you’re always aware that your gain is probably someone else’s loss.

After that, I set the poncho aside for other projects. Looking at it reminded me of an unhappy time, and I didn’t want to pick it back up. A year has gone by, though, and I’ve returned to this project in hopes of finishing it for Miss E’s 4th birthday. Now, when I look at it, I remember the tough days when I started it, but I also think about how making this little poncho kept my mind occupied and how much joy it will ultimately bring an adorable little girl.

So, if you’re a crafter (and you probably are if you’re here!), don’t hesitate to grab a ball of yarn or some embroidery floss the next time stress invades your life. The stitches may not come out perfectly, but you’ll always know that your makes saved your sanity on a rough stretch of road.

In the Mood for Mood Fabrics

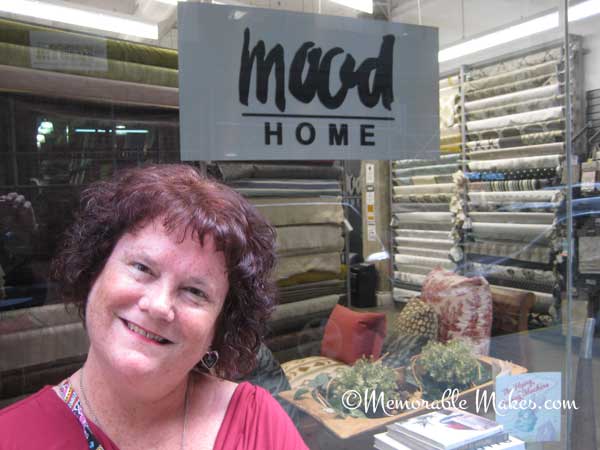
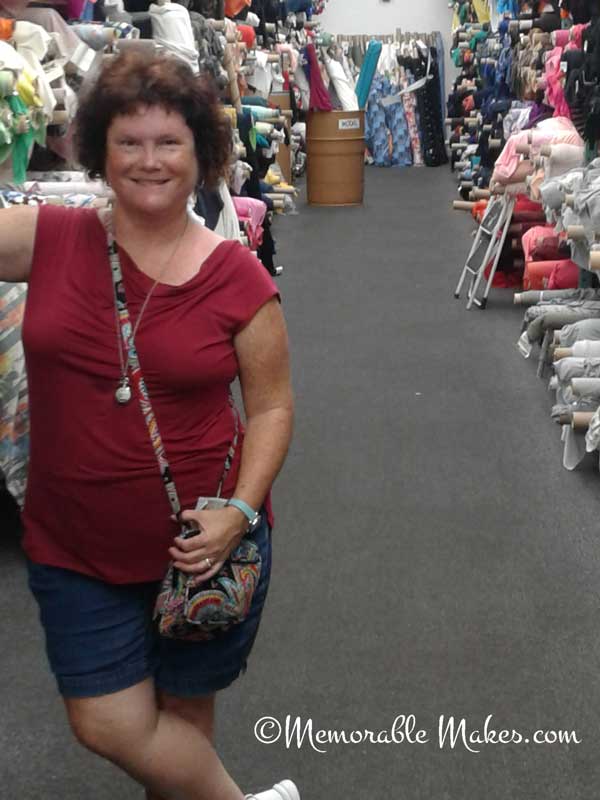
If you’ve ever watched Project Runway, you know every episode includes a trip to Mood Fabrics in NYC. So when the hubby and I visited last month, I just had to see it in person. Let me just say that it is massively overwhelming, but in a good way! The store covers three floors, and each one is stacked with rolls and rolls of fabric, organized by fiber type.

One funny tidbit–the street-level store is actually Mood Home, which sells home-decorating fabric. The regular store, which sells all manner of apparel fabric, is located upstairs, and you can’t really see it from the street.

Whenever I would watch Project Runway contestants struggling to pull fabric off the shelves, I wondered why it was so hard to access the material. Now I know. Those rolls are heavy, and the one you want is inevitably below several other rolls. However, the staff is always ready to help. There were multiple staffers on each floor, and I was asked several times if I needed assistance.

Don’t you just swoon when you look at the photo above? Sigh, sooo much to choose from. I ended up buying just one cut of fabric, a remnant from Carolina Herrera. Many famous designers send their leftover fabric to Mood for sale, and you just have to be willing to work with what’s available. For instance, when the staffer rolled out the fabric I had chosen, there was only 1-3/4 yards available before a weird cut appeared on the roll. I had wanted to buy 2 yards, but I’m sure I can make do with what I got; I’m thinking a skirt. I also bought a “Thank You, Mood” shirt and bag! Unfortunately, Swatch the dog didn’t make an appearance. I would have loved to pet him.

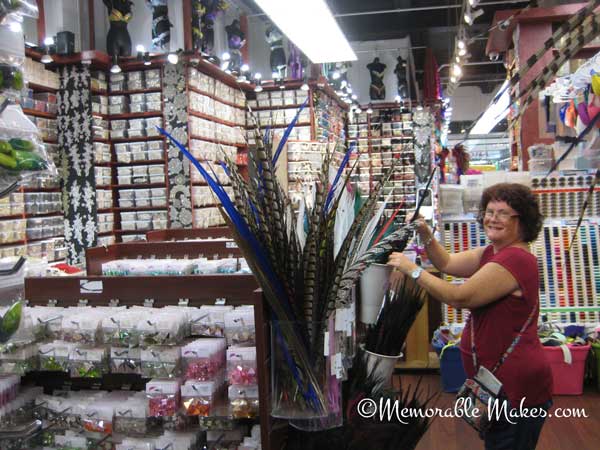
After leaving Mood, we wandered around the garment district and bopped into a couple of stores that sell trim. I didn’t buy much, because you would really have to know exactly what you wanted it for, but just imagine having access to these supplies all the time!

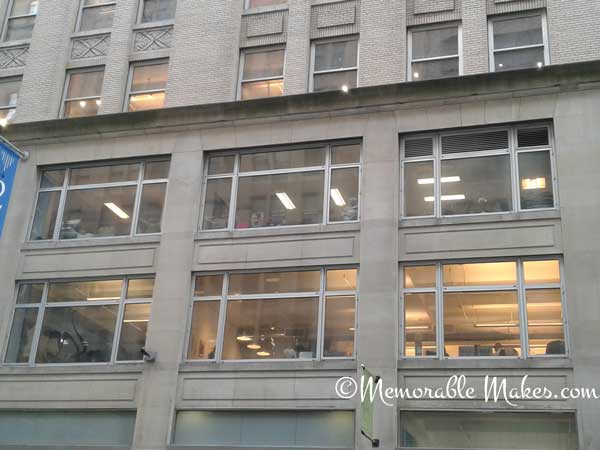
The other fun and inspiring thing about the garment district was seeing the studios that are on the upper floors of some buildings. This photo may not really show it, but these are all working studios where it was clear that garments were being produced–I could see the clothing racks and mannequins. I love the huge windows and all the natural light. Wouldn’t it be fun to have a place like that to sew in??

That’s it for my little tour of the garment district. If you’re a sewist, I hope you get to visit someday!

Summer Sewing

I don’t know about you, but when I’m dressing casually, I typically go for a t-shirt and shorts. After all, I live in Florida, so in July and August, that’s about all I can stand! But when my hubby and I planned a special trip to NYC to celebrate our 25th anniversary, I suddenly decided to step up my style game with some breezy dresses, the type of thing I could wear out for the day and also feel comfortable wearing for dinner if I never had a chance to change.

So, I did what many avid sewists do. Our trip was planned for mid-July, and I went and bought fabric in April. And stared at it in May. And all throughout June. By July 6, I knew I had to get cracking! Thankfully, I had selected easy patterns. In seven days, I churned out two dresses and a skirt. Actually, I made a third dress, but the fit wasn’t right so I didn’t finish it for the trip. In fact, I’ve abandoned it altogether, but that’s a story for another day. Here’s how my makes turned out.

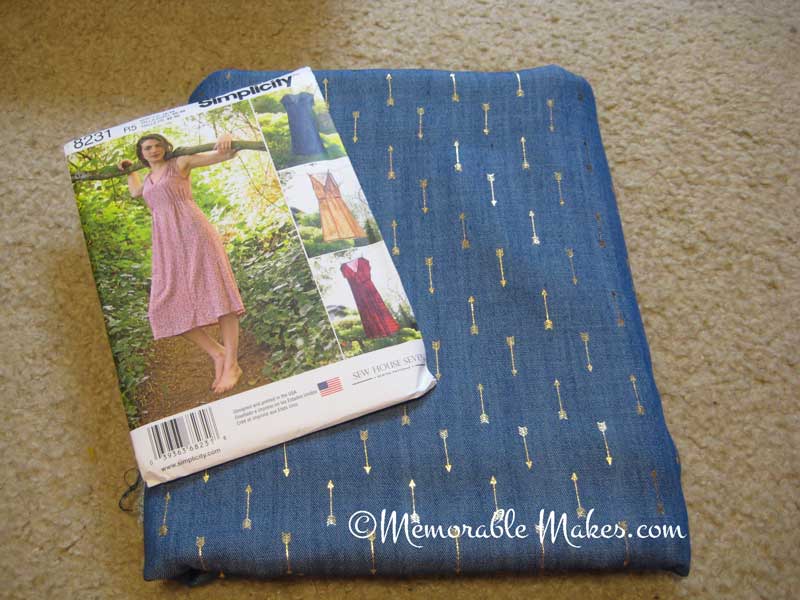
This fabric (I LOVE the little gold arrows)…

became this dress:

I love the look and fit of this dress (Simplicity 8231). It went together very quickly, but I did have to fool around with the neckline facing a bit because it was gaping some. It required some unpicking (as the Brits say–doesn’t it sound so much nicer than “ripping”?) and resewing. BTW, that’s a photo of me outside the Lion Brand Yarn Studio, ’cause you know I had to see it!

And this second piece of fabric…

became this little number:

This silky fabric pairs very well with this pattern (Simplicity 1375), but it is a tad thick for the design of the drawstring waistband because the thickness makes it a little difficult to pull the drawstring as tightly as I would like. I always look for fabric that isn’t too sheer (don’t need to offer a peep show!), but I will take fabric thickness into account when using patterns with drawstrings in the future. Lesson learned, but it’s still really cute!

I’ll post a few more NYC photos soon because you just know I had to make a trip to Mood Fabrics and the garment district!

Hooray for Craftsy Unlimited!

Most crafters I know like to have some type of entertainment going while they’re working, whether it’s an audio book, some music or a binge-worthy show. I’m a binge-show kind of gal, so I was ecstatic when Craftsy introduced Craftsy Unlimited. Basically, Craftsy took its fabulous online classes and made ALL OF THEM available for one low price! Whether you’re into crochet, knitting, quilting, apparel sewing, cooking or baking, Craftsy Unlimited has you covered. And if you’re like me, and you just can’t say no to any craft, then you can hop around the different categories to your heart’s content. Since buying my subscription, I’ve learned how to sew a bralette (oh la la), do free-motion quilting and coat a cake with a chocolate mirror glaze that’s pretty enough for a restaurant (gelatin is the key, who knew?).

So I was pretty geeked up when I got an email last week telling me that Craftsy is offering The Good Life Quilt Along class taught by Angela Walters as an exclusive for Craftsy Unlimited members!! And, to top it off, the company offered me a 50% discount on the kit of my choice, as well as free expedited shipping! This company knows how to take care of its members, that’s for sure. I hit that purchase button about as fast as I could, I tell you. When my kit arrived yesterday, I made this short video to show you the contents and just go over how well Craftsy packages all its kits. I’ve ordered a few so far, and I’ve always been impressed with the quality, packaging and speed of delivery. Check out the video below. Also, I forgot to mention in the video that the kits also come with a full-color printed pattern so I don’t even have to use my own ink.

You can still order your kit today and receive it in time to start the QAL on June 15. But even if you order a little late, you’re still going to enjoy this beautiful pattern, which has kits in four color schemes and multiple sizes. I ordered the Cute as a Blossom kit in the throw size. I’ve recently completed two queen-size quilt tops, and I really wanted to try something a little smaller and quicker to finish! Here is a photo of what the finished quilt will look like:

Craftsy Unlimited offers new members a 7-day free trial to poke around and sample the content, so give it a whirl. You’ll never again complain about having nothing to watch!

Note: This post contains affiliate links which earn me a small commission upon purchase, at no cost to you.

Blocking Granny Squares

Can I just say that I LOVE crocheting granny squares? There’s just something sooo satisfying about the way those colors contrast, and the squares work up so quickly that it’s basically instant gratification. In fact, if I only have a few spare minutes available, granny squares are often my go-to craft because I know I can knock out at least a couple of rounds before I have to be on to the next task.

Once you have a nice stack of granny squares ready to join into an afghan or other finished project, you must answer the dreaded question all yarn lovers face–to block or not to block? When it comes to grannies, I’m a big fan of blocking because it straightens out those curled edges and makes the squares more manageable during the joining phase.

Wet blocking usually involves pinning an item to a foam piece (or a folded towel) and then spraying with water and letting the item dry. I always found the task a bit time consuming for all those little grannies, and then I saw a crochet magazine that included a free giveaway–a blocking board for granny squares. And that’s when I had the idea for this little gadget.

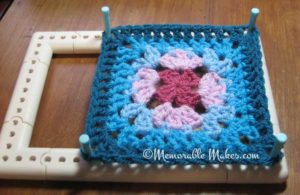
This is a Martha Stewart loom set that can be configured in a variety of shapes, and I use it for loom knitting. I grabbed a few pieces of the loom pieces and added pegs to create a square that’s just the right size to block my grannies. I just slip on one granny, spray with water, then add another granny and repeat. I can fit up to three grannies on the blocker.

With this system, it takes me only about 60 seconds to set some grannies to block, and then I just take them off the blocker a few hours later or the next day. This will make the joining process much easier, and I love it when my craft supplies can pull double duty! By the way, if you’re wondering, this pattern is the Harmony Blanket from Attic 24. I’ve made 10 out of 14 sets so far, and I can’t wait to see how this lovely comes together.

Paper Fan Dress

I suppose that as one of the first projects I want to show you, it’s only fitting that I should present a couple of dresses that I have made for one of my favorite Memorable Makes recipients, my great-niece, the fabulous Miss E. She’s 3.5 now, and I made both of these dresses for her when she was 2, shortly before her 3rd birthday. I made them both a little big, and they still fit her, so I’m glad I did. I used this great free pattern for the Paper Fan Dress from the incredibly talented Anna Marie Horner.

The first photo is the front of the dress, and the second is the back. The dress wraps around the back and closes with two large buttons on the bodice. It’s goes on so easily, and I think it’s perfect for an active little girl. I also like that the dress is loose enough that Miss E. can wear a long-sleeve shirt and tights under it to get a little more wear out of it in the colder months.

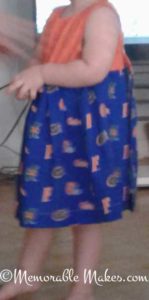
I apologize for not have a better photo of the second dress, which I made in Gator fabric because we are all big fans and she needs to have something special to wear when we watch the games–go Gator Nation! My phone camera doesn’t take the best indoor pictures, and like I said, Miss E. is always on the move!

Depending on which size dress you’re making (it runs from size 2 to 7/8), you need just 1 to 1.5 yards of fabric for the skirt, so this is a great pattern to make use of those novelty fabrics you just had to have!

Day One

Hello, readers. OK, I know I don’t actually have any readers yet, but I’m sure I will someday and when you go back into the archives to find this first post, I want you to feel welcome!

This is the first post of my new blog, Memorable Makes. As you might guess from the blog’s name, I love to make all sorts of things. You name it and I make it–handmade clothing, quilts, crocheted afghans, elaborate cards and thoughtful scrapbooks.

When I told my husband I wanted to write a blog about the various things I make, I mentioned that I wasn’t sure how to marry all my different handmaking endeavors together on one site. Most crafting blogs focus on one particular craft, but I knew my blog would flit back and forth between all of my favorites. My husband, bless him, immediately saw the solution. “Your crafts always have a story. You make things for particular people, for particular reasons. Tell the stories behind what you make.”

So that’s my vision for this blog. I’ll show you what I’m making, give you some tips and tutorials, and some details about why I’m making a particular item and what’s going on in my life while I’m making it. In other words, I’ll tell you why my makes are memorable. Along the way, I hope you’ll find some things you’d also like to make while you create your own happy memories. I look forward to getting to know you!